
How to Extract Data from a Website to Excel
Easy Scraper AI8 min read
Short answer
To extract data from a website to Excel, open the page in Chrome, start a no-code scraper such as Easy Scraper AI, let it detect the list and split it into columns, scrape every page and export a CSV file. Excel opens the CSV directly. For a single static table, Excel's built-in From Web import also works.
Transcript
- Here's how to get data from a website into Excel, without writing code.
- Open the page that has the data you want in Excel.
- Click the Easy Scraper AI icon to open the side panel.
- Check the detected list and its columns. Each column shows a sample value.
- Under Paging, choose how the site loads more items. Here, that's Next page.
- Press Start, and wait for the counter to stop. It ends by itself when there is nothing new.
- Open the results window and click CSV.
- Open the downloaded file in Excel.
- Accented and non-Latin text shows correctly.
- Easy Scraper AI. A no-code web scraper for Chrome.
On this page
Copying rows from a website into Excel by hand works for ten rows. For a product catalog, a directory or a few hundred search results, it doesn't.
This guide walks through three ways to do it — a browser scraper, Excel's own From Web import, and plain copy and paste — and shows what each one actually gives you. The examples use Books to Scrape, a public practice site built for trying this out.
What you need
- Google Chrome on a computer (version 114 or later)
- The Easy Scraper AI extension
- Excel, or Google Sheets if you prefer
- The page with the data open in a tab — logged in, if the site requires it
Steps
Step 1: Open the page that has the data
Go to the page that shows the list or table you want. If the site needs a login or a search, do that first so the data is on screen. A scraper in your browser sees the page exactly as you do.
Step 2: Open the Easy Scraper AI side panel
Click the Easy Scraper AI icon in the Chrome toolbar. The side panel opens next to the page, so the page stays visible while you work.
Step 3: Check the detected list
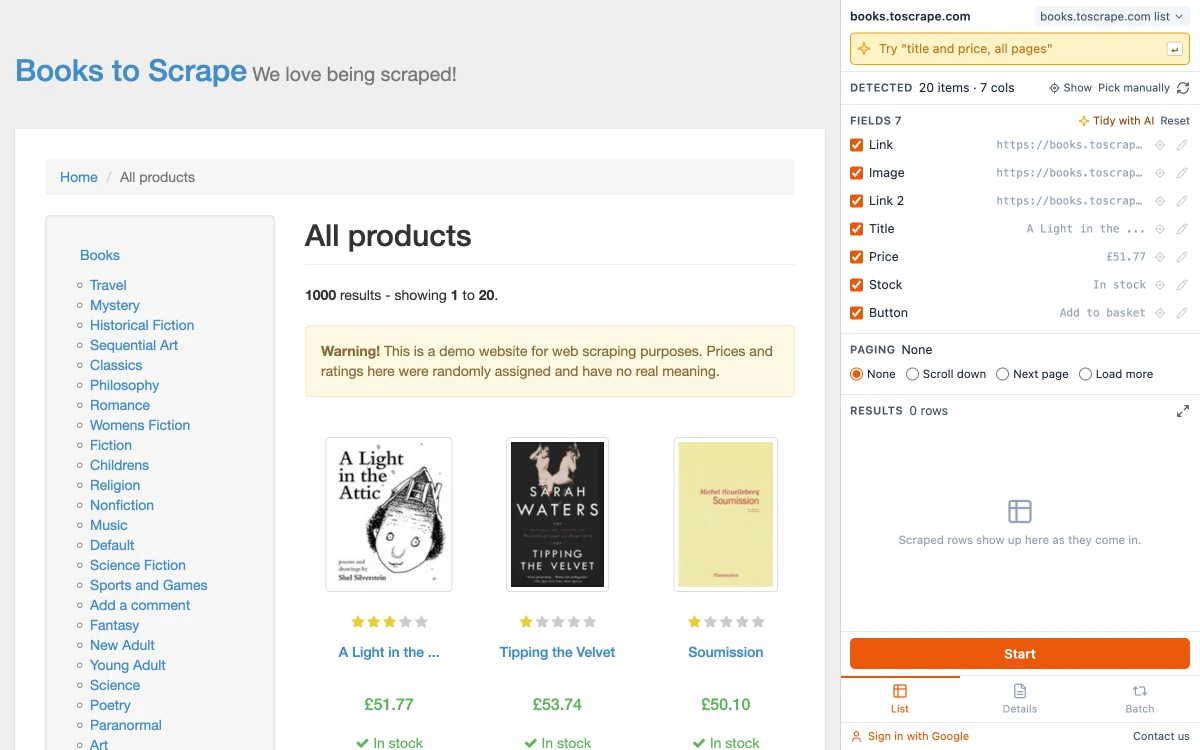
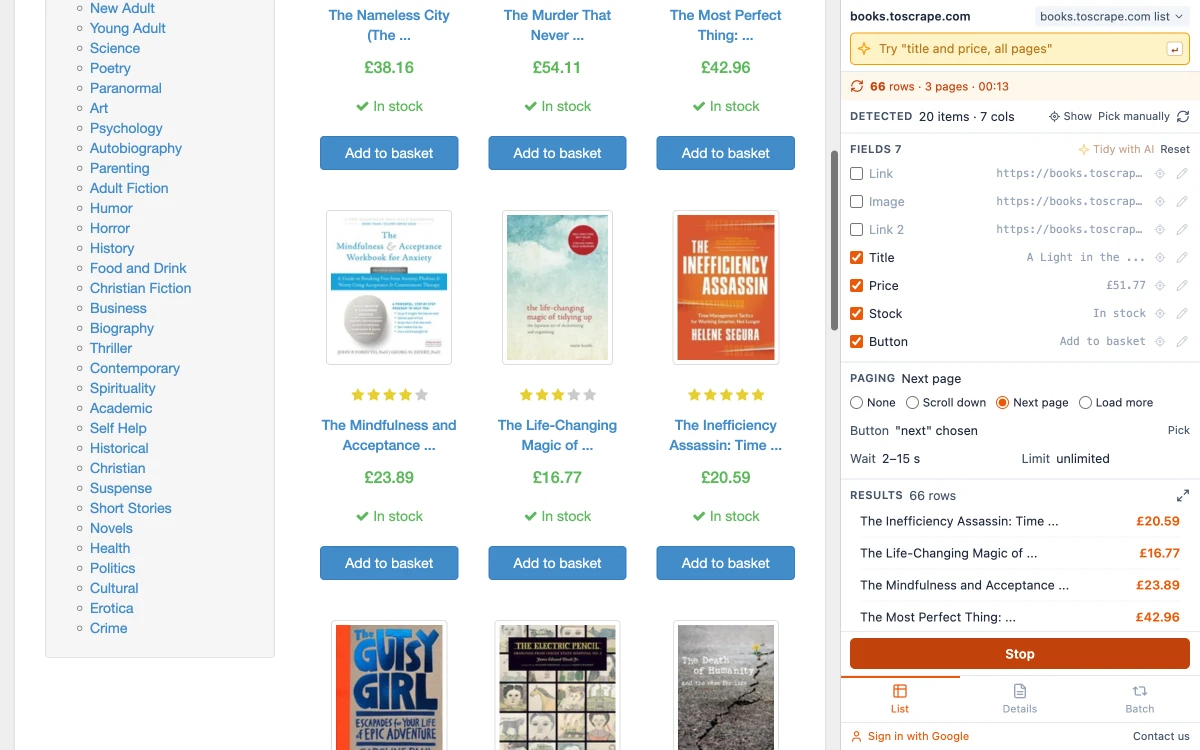
After a moment the panel shows "Detected" with the number of items and columns — on the practice site, "20 items · 7 cols" — and one field per column, each with a plain name (Title, Price, Link) and a sample value so you can tell which is which. The items it found are outlined on the page for a moment so you can see what was picked up.
Step 4: See where each column comes from
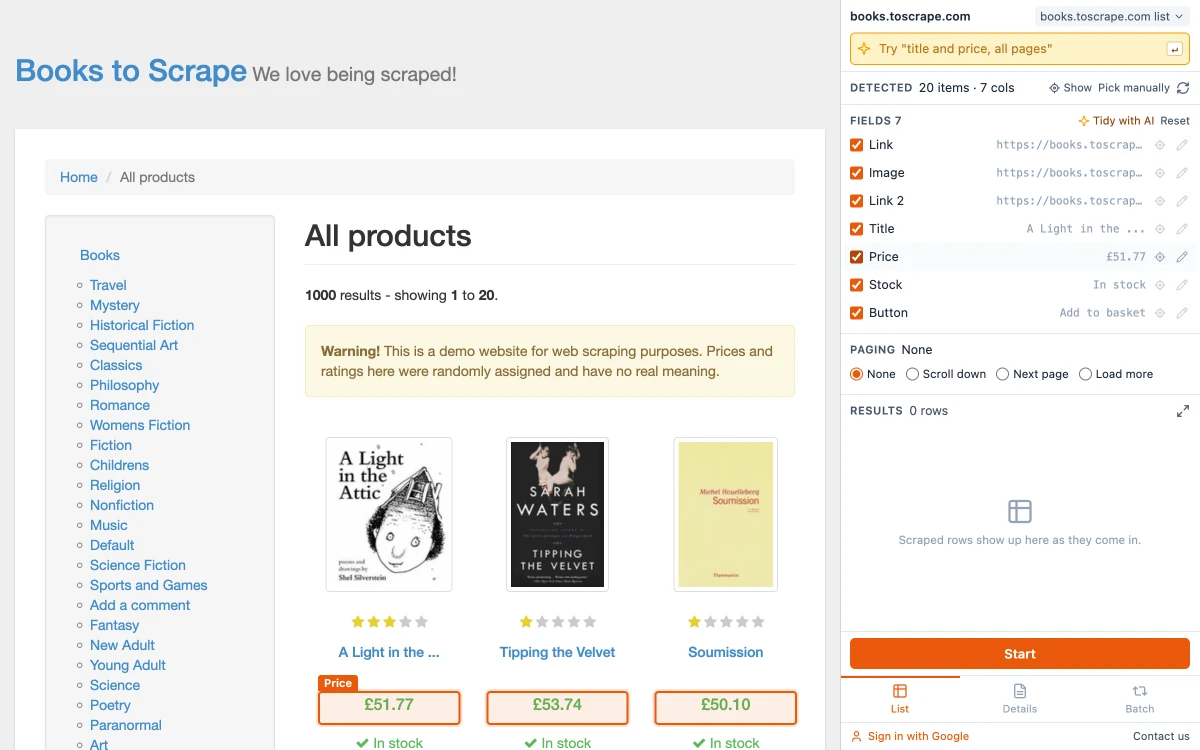
Move the mouse over a field in the panel and its values are outlined on the page — hover Price and every price gets a box. The small target icon next to a field scrolls the page to it, and "Show" next to "Detected" outlines the items themselves. On a long page this saves hunting for what was found.
Step 5: Untick the columns you don't need
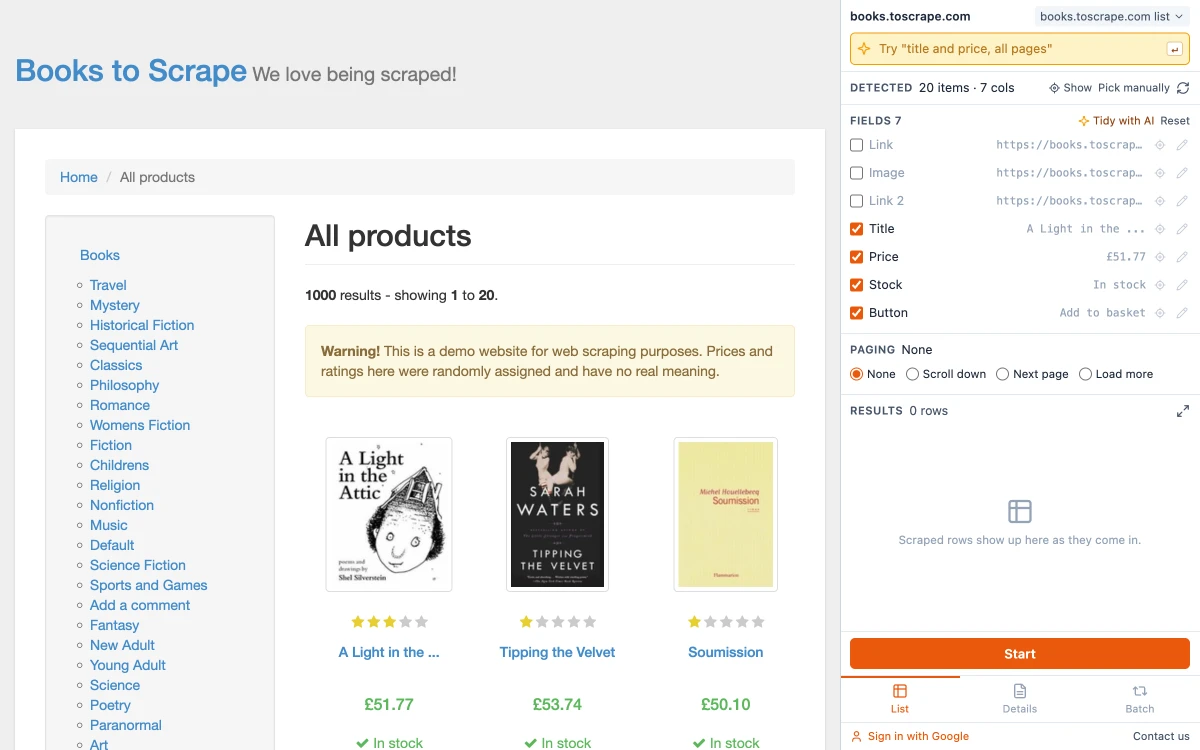
Only ticked fields are collected. In the example the two link columns and the image column are unticked, which leaves the title, price, stock status and button text. If a name does not fit, click the pencil next to it and type your own. Reset brings every field back.
Step 6: Choose how the site loads more
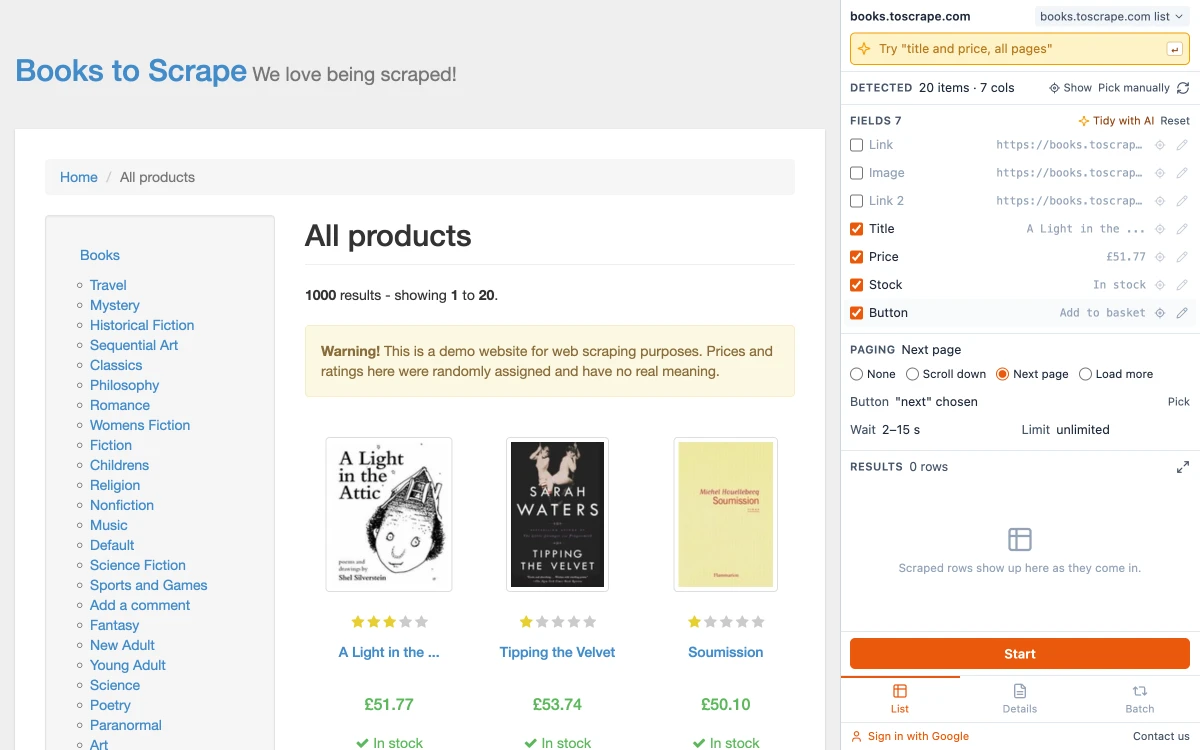
Under Paging, pick Next page for numbered pages, Load more for a button that adds items, or Scroll down for pages that load as you scroll. Leave it on None if everything is on one page. With Next page, the button is found for you and shown next to "Button".
Step 7: Press Start
A counter at the top shows rows and pages as it goes — "66 rows · 3 pages" in the screenshot — and the newest rows appear under Results. It stops by itself when there is nothing new. You can press Stop at any time and keep what has been collected.
Step 8: Export CSV and open it in Excel
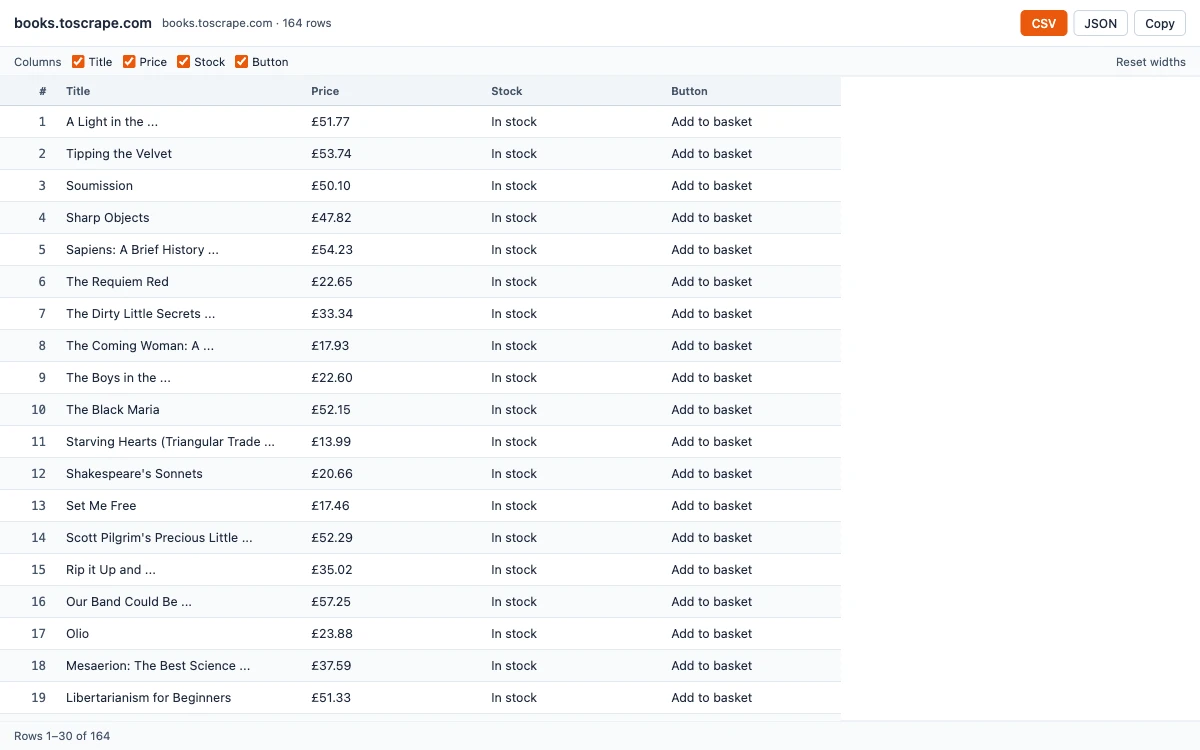
Click "Open results window" (the expand icon next to Results), then CSV. The file is named after the site and the date, for example books.toscrape.com-2026-10-06.csv. Open it in Excel: accented and non-Latin characters show correctly without any import settings.
What the exported file looks like
The run in the example was stopped by hand after eight pages and produced 164 rows. These are the first rows of that CSV, unchanged:
| Title | Price | Stock | Button |
|---|---|---|---|
| A Light in the ... | £51.77 | In stock | Add to basket |
| Tipping the Velvet | £53.74 | In stock | Add to basket |
| Soumission | £50.10 | In stock | Add to basket |
| Sharp Objects | £47.82 | In stock | Add to basket |
Two things are worth noticing. The columns already have plain names: they are worked out from what each column holds, and any of them can be renamed in the panel before you export. And the first title is cut short because the list page itself shortens it: a scraper copies what the page shows. To get the full titles, collect them from each item's own page — see how to scrape a list of URLs.
Tidy the data in Excel
- Check the headers. A column the scraper could not name is called Text 1, Text 2 and so on. Type a better name over it, or rename it in the panel before exporting.
- Turn prices into numbers. A price such as £51.77 arrives as text. In a new column, strip the currency sign and convert it:
=VALUE(SUBSTITUTE(B2,"£",""))- Remove duplicates. Select the table, then Data → Remove Duplicates.
- Keep the header in view. View → Freeze Panes → Freeze Top Row.
- Filter and sort. Select the header row and press Ctrl+Shift+L (Cmd+Shift+L on a Mac) to add filter arrows.
Method 2: Excel's own From Web import
Excel can read a web page by itself through Power Query. In Excel for Windows:
- Go to Data → Get Data → From Other Sources → From Web.
- Paste the address of the page and click OK.
- In the Navigator window, pick one of the tables Excel found and check the preview.
- Click Load, or Transform Data if you want to clean it first.
This works well for a plain HTML table on a public page, and the query can be refreshed later. Microsoft documents it under Import data from data sources (Power Query). It has limits:
- It only sees real tables. Product cards and search results are usually not tables, so the Navigator shows nothing useful for them.
- It reads one address at a time, so a list spread over many pages needs a query per page or some M code.
- It can't scroll or click, so content that loads as you scroll is missed.
- It doesn't use your browser session, so pages that need a login often fail.
Method 3: copy and paste
For one small table, selecting it with the mouse and pasting is still the fastest way. Paste with Paste Special → Text (or "Match Destination Formatting") to avoid dragging fonts, colors and links into the sheet. It breaks down as soon as the list is long, split over pages or made of cards.
Which method to use
| Method | Works for | Falls short when |
|---|---|---|
| Copy and paste | A small table on one page | The list is long, paginated or made of cards |
| Excel From Web | A plain table on a public page that you want to refresh | The data needs a login, scrolling or several pages |
| Browser scraper extension | Tables, card lists and multi-page results, including pages you are logged in to | The page never shows the data in the browser |
Using Google Sheets instead
In the results window, click Copy and paste into an empty sheet; the columns line up. Sheets also has its own import formulas for public tables. Both are covered in the Google Sheets guide.
If the file looks wrong in Excel
- Numbers treated as text, or leading zeros lost: import the CSV through Data → From Text/CSV and set the column type there instead of double-clicking the file.
- Dates in the wrong order: Excel reads dates using your regional settings. Import through Data → From Text/CSV and choose the right locale.
- Empty cells: the page didn't show that value for that item. Open the item on the site to confirm.
- Fewer rows than expected: the run ended because a page brought nothing new. Check the Paging option; the guide on how to scrape multiple pages explains each one.
Common questions
Yes, with Data → Get Data → From Other Sources → From Web. It reads plain tables from a single public address. It doesn't follow pagination, scroll or use your login.
Related guides
Web Scraping with Google Sheets: 3 Ways to Get Website Data into a Sheet
IMPORTHTML, IMPORTXML or a browser scraper: what each can read, where each stops, and formulas you can copy.
Read guideHow to Extract a Table from a Website
Pull a table, a card grid or a search result list off a web page and keep only the columns you want.
Read guideHow to Scrape Multiple Pages Without Code
Follow Next page buttons, Load more buttons and infinite scroll automatically, and collect every item into one table.
Read guide